Nail Prep: The Step That Decides How Long a Set Lasts
Nail prep is where retention is won or lost. Clean, push back the cuticle, remove shine, dehydrate, and keep product off the skin. Do it the same way every time, and lifting stops before it starts.

Summary: Nail prep is where retention is won or lost. Clean, push back the cuticle, remove shine, dehydrate, and keep product off the skin. Do it the same way every time, and lifting stops before it starts.
Nail prep is the single most important step in any enhancement. Most lifting and early breakage start here, not with the product. So a set fails at the foundation before the acrylic or gel ever gets a chance. Because of that, prep is where you win or lose retention, and it is the first thing I check when a student brings me a failed set.
I know why techs rush prep. The client is waiting, the day is full, and prep feels like the boring part. But a rushed foundation costs you a callback, and a callback costs far more than the minutes you saved. So slow, consistent prep is the fastest habit you can build.
Why Nail Prep Decides Retention
Nail prep controls whether the product bonds to a clean, dry surface. Product sticks to a prepped nail. It slides off oil, dust, and shine. So the same prep, done the same way, gives the same strong bond every time.
- Oil and moisture cause lifting. Product cannot bond through them.
- Leftover shine blocks adhesion. A slick surface has nothing to grip.
- Product on the skin lifts and reacts. Flooded cuticles cause lifting and raise sensitivity risk.
This nail preparation logic is simple. Because a clean, dry, matte surface bonds best, every prep step is really removing something that is in the way. So think of prep as clearing the surface, not adding to it.
The Nail Prep Steps, In Order
Follow the same order every time. So nothing gets skipped under pressure, and pressure will come.
- Sanitize. Clean your hands and the client's hands. Then wipe the nails to remove surface dirt.
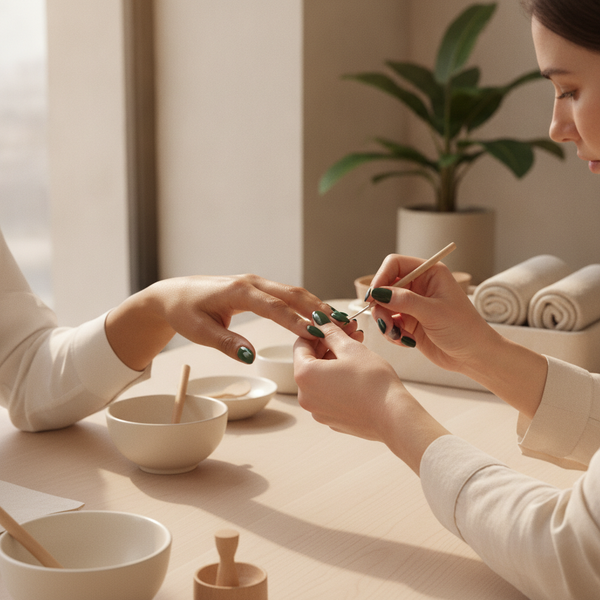
- Push back the cuticle. Gently push and clear the cuticle from the nail plate. Product must sit on nail, not skin.
- Remove the shine. Lightly buff the surface to a matte finish. Do not thin the nail; just break the shine.
- Remove dust. Brush away all filing dust. Leftover dust blocks the bond.
- Dehydrate and prime. Use a dehydrator to remove oil and moisture, then the primer for your system.
Match the prep to the product. Because each system has its own primer and base, use the ones from your line. So do not mix a primer from one brand with a product from another and then wonder why the set lifted.
Keep Product Off the Skin
This is the habit that separates lasting sets from callbacks. So make it a rule, not a goal.
- Leave a tiny margin. Keep product a hair off the cuticle and sidewalls.
- Clean up as you go. Wipe any flood before you cure or set.
- Cap the free edge. A capped edge seals the enhancement against water and lifting.
Because skin contact drives both lifting and allergies, clean sidewalls protect wear and comfort at once. So the same neat work that stops lifting also lowers reaction risk. I want you to hear that as one habit, not two.
Prep Is the Front of the System
Prep does not stand alone. It is the front of a complete system. So it works best with a matched product line, the right lamp, and correct curing.
Choose safe-chemistry products across the service too. MMA-free acrylics and a HEMA-free gel option lower reaction risk when paired with product-off-the-skin prep. So the same care you put into prep should carry through the whole set.
Nail prep is not the boring part before the real work. It is the real work. Clean, clear, matte, dry, and off the skin, done the same way every time. Get prep right, and your sets run two to four weeks with far fewer callbacks. Then your clients rebook, and they bring friends.
Frequently asked questions
Why is nail prep so important?
Nail prep is where most lifting and early breakage start. Product bonds to a clean, dry, matte surface and slides off oil, dust, and shine. So a rushed prep fails at the foundation before the product ever gets a chance.
What are the steps of nail prep in order?
Sanitize the hands and nails, push back the cuticle, lightly buff to remove shine, brush off all dust, then dehydrate and prime. Follow the same order every time, so nothing gets skipped under pressure.
Should I remove the shine from the natural nail?
Yes, but gently. Lightly buff to break the shine to a matte finish, without thinning the nail. A slick surface has nothing for the product to grip, so a little shine removal greatly improves the bond.
How do I stop enhancements from lifting at the cuticle?
Keep product off the skin. Leave a tiny margin at the cuticle and sidewalls, clean up any flood before you cure, and cap the free edge. Skin contact is a top cause of both lifting and allergies.
Do I need a dehydrator and primer for good prep?
Yes. A dehydrator removes oil and moisture that block adhesion, and the primer prepares the surface for your system. Use the dehydrator and primer from your product line, since mixing brands makes the bond unpredictable.
LNC Professional supplies complete, safe-chemistry systems for professional nail technicians. Designed in the Caribbean, built for the world. See the range at lncpronails.com.
Have a question about a system, or want the safety data sheet for a specific product? Message us on WhatsApp at +1 (562) 548-7272. We answer.
Related reading
- Nail Lifting: How to Stop It at the Root
- Long-Lasting Nail Sets: How to Make Them Last 4 Weeks
- Acrylic Nails Keep Breaking? The Real Cause and the Fix
Authoritative sources
- Nail Care Products. US Food and Drug Administration.
- Manicurists and Nail Technicians: workplace exposures. NIOSH, US Centers for Disease Control and Prevention.